Showing posts with label 多肉植物. Show all posts

Sunday 31 July 2016

多肉植物之砍头

我很爱给我的多肉植物砍头。我心理变态,不喜欢它们长太高太大,所以我时常修剪,砍头是个绝好的做法。(当然,如果你上网查一查,你会发觉我的方法不太正确。可是,我的“园艺宗旨”是活下来的证明它生命力强,活不下来娇生惯养我也不想种。哈哈!)

我的銘月长得不错,决定给它砍头。我向来懒惰,通常砍了头就直接把它插入泥土。这次想看看长根的速度,于是学人家放了一小盆水,砍头处的伤口不可碰及水面,就这样摆在一旁即可。


两个星期后就看见根了,看仔细些还有个小BB呢。


像铭月这般生命力强的多肉,砍头可以不按牌理出牌,就这么简单的又多了一棵呢。

Sunday 24 July 2016

紫米的阳光水分控制

多肉植物之所以好玩,因为它的成长速度、外观、颜色等都会因周遭多种因素(阳光、水分等)而影响。同一棵母株衍生出来的小树在不同的环境下会大有不同,有时候甚至认不出是同一个品种呢。所以,有空玩玩DOE也不错的。

比如说紫米。紫米是其中一种最容易种的多肉,基本上你可以任它自生自灭而它依旧开花成长。我的其中一盆控水(顾名思义,就是控制浇水的量,从而实现对土壤湿度的控制)、三盆全露养(让‘天公’照顾)、一盆半室内环境(半透明pergola墙边)。这就来比较比较。


这一盆我放在屋檐边,阳光充足,下大雨时会被雨水喷到。平时不经常浇水,三五天浇一次。沙石:腐植土一对一比例,盆子底层还有小石子。

植物高度一直在我喜欢的适中高度。颜色转紫。(近期雨水多,叶子绿色渐多。)

这一盆是全露养,阳光充足,下雨时雨水直接淋下。最近雨水多,很快爆盆,但由于是用普通塑胶盆,排水洞很多,土壤还不至于太湿,所以徒长的不算太多,大多数高度都比盆糕一丁点而已。
这一盆也是全露养,阳光充足,下雨时雨水直接淋下。这其实是陶盆,但了上漆。排水洞只有一个,所以相较上面那盆土壤必定比较潮湿,所以这一盆严重徒长。

这一盆也是全露养,不同的是,这个盆是“懒人盆”,下端转开可以存水(就不必常常浇水咯),但土壤不会过度潮湿(看下图)。

因为这阵子雨水多,所以盆的下端长期积水。根系比较好的都徒长得乱七八糟(因为根部已经长到盆的下端),还在发育中的因为没有根部还没太长,就处于短小模样。


这一盆则是摆在我家的pergola墙边。阳光还算充足(pergola半透明盖顶),每天应该有三小时左右的阳光。由于是组盆,我没特意控水。盆是陶盆,盆的底部是石子,土壤是沙石、沙子、腐植土1:1:1。

组盆内的紫米徒长,因为阳光相对不足(紫米太爱阳光了),水分充沛。


如果你喜欢你的紫米快速爆盆,那就任它日晒雨淋吧。等它爆盆后修剪,再控水让它转紫,就不负其名啦~

Sunday 17 January 2016

Winsor & Newton Cotman Water Colour Compact Set

我向来崇拜文艺青年,那种随手一挥就是画,随意张口即成诗的风采,最叫人神往。我虽然完全没有半分艺术细胞,但爱模仿,成不了文艺青年,沾点边儿也不赖。2015年自学素描,2016年本来是要自学水墨画的(书都买了几本),却因为朋友的水彩画,让我对水彩好生向往。

我做不成文艺青年,但决定带水彩旅游去。去年双十一就上淘宝掏了盒Winsor & Newton Cotman Water Colour Compact Set。可是一直忙着,也就把它给搁在一旁。今天难得突然有了几个小时的空余时间,立刻开张练习练习。

这系列非常适合携带,小小一盒,十二个颜色加上一枝水彩笔。

我原本想买铁盒的,但薇给我找了个塑胶的,不错,轻便得很。

别看它就这么简简单单,其实内有乾坤。

盒盖上有两个可以拆出来的水彩盘,颜料也可以拆出,应该是方便用完时可以更换吧。


把包装拆了,发觉颜色很好看。

由于这买了是要改天旅行时用的,我决定用最少最方便的画具试一试。这一次,我用上self moistening art brush

第一幅我画了好望角碰见的可爱轿车,那时候的蓝天非常澄蓝,轿车载着艘独木舟,颜色非常艳丽耀眼。我一直想画…… 这幅,怎么看都像小学生的作品。不好意思,学习中嘛……

画完一幅画,也就用了一个水彩盘。好像挺方便的。


再尝试画一画丽莲娜。颜色没法拿捏,好丑。(当然,这是画者的问题,与水彩无关)

最后,用一枝self moistening art brush,不用水彩盘,慢慢尝试,总算稍微找到好好沾上颜色的窍门了……

用这个的话,我出门可以只带一盒水彩,两枝self moistening art brush和一枝water resistant ink pen,就可以扮九流画家了,呵呵,不错哦!

Saturday 17 October 2015

A Kiss for Echeveria Lilacina

Mey helped me to get my first Echeveria Lilacina (Ghost Echeveria / Mexican Hens and Chicks), a succulents species that is very popular in the West. (I followed a few succulents group on Google+). I decided to DIY a pot using one of my favorite tin canister, a gift from Ling years ago. 


First, make a few holes at the bottom of the canister. I used only hammer and screwdriver, so yes, this is super easy.


Then I use some small rocks to layer the bottom.


After that, I put in a layer of coal, and followed by soil that mixed with pebbles. Plant in the Echeveria and you get yourself a lovely decorative succulents pot.


Tuesday 8 September 2015

多肉组盆新实验-竹炭

在Daiso看见RM5.30的竹炭,决定买一盒回来(400g大粒装),试试看对多肉种植会不会更好。

首先在盆里放一些小石子。


然后倒入竹炭,直到覆盖了差不多盆子的一半。


放入泥土(我的泥是腐殖土:沙石一对一)


把喜欢的多肉依层次一一种下。然后铺上小石子,放上摆设,这就完成啦!希望这些用竹炭的可以更加茁壮成长。

Tuesday 1 September 2015

小小多肉鸟笼

总觉得鸟笼造型的多肉组盆非常漂亮,托朋友替我买了一个超级小的鸟笼却一直搁在一旁,这次乘国庆日假期,终于动手做一个了。

1. 在鸟笼底放了一点椰丝垫底,以便可以盛泥土。


2. 同时把水苔泡水


3. 水苔湿透后再把水苔挤干


4. 把水苔铺上弄成碗状,铺上泥沙即可开始栽种


5. 我选了若绿和雅乐之舞作为露在鸟笼外的多肉以增加层次感。紫米则种在鸟笼中央增添色彩。


接下来,就只能耐心地等待小小多肉们长大了……

Sunday 30 August 2015

露养多肉

我不太赞成娇生惯养植物, 否则它们动不动就落叶、枯萎、徒长、实在让我抓狂。所以,开始种了多肉植物不久后,我就决定把比较能耐日晒雨淋的多肉都种在我的花圃内,露养去!

这种懒人种法的好处是可以由他们自生自灭,完全不需照顾。坏处是热带的狂风暴雨来临时也只能眼睁睁任由他们浸泡在水中。这种种法的死亡几率比种在盆里的露养法确实是高了一些。

我在网上看见有位住在Florida的洋人用这方式露养,我们的雨量和日照应该与他不相上下,我决定也依这个概念弄个多肉露养区:


首先,我铺上了一层约两寸的石子,再加上约两寸的小石子。


把腐殖土和沙子用一对一的比例混匀,然后铺在小石子上。


然后再把多肉们给种下,实验由此开始。第一批种了(由右至左)火祭、紫珍珠、朱莲。过后又托朋友在金马伦买了大棵的火祭和紫珍珠一起种下,结果大小火祭和中型紫珍珠几个星期后归西。
'15年四月尾种下的第一批


不久后又有朋友给我买了花立田,我也种了几棵不死鸟来填补空位。


之后又种了黛比,颜色漂亮极了。


下图是今天我的多肉露养区(多购买了几个品种,把不死鸟给移植到别处了,怕她们瞬间全盆侵占)。确定在热带也可以丢在那儿任他自生自灭的有:紫珍珠、朱莲、花立田、雪娟、黄丽、丽娜莲、兰黛莲、黛比(不过泥土潮湿会导致落叶,必须想法子让叶子不碰到泥土)……我的露养区还有空位,还打算慢慢增加品种实验实验呢!

Friday 1 May 2015

My Weekend Flower Bed Project

Where the idea comes from:
A few weeks ago, Moy See posted photos of her mum's beautiful garden, and subsequently, almost the whole world is uploading spring flowers photos on Facebook. I decided that I need a flower bed too! 

I got seeds from Moy See's mum, and I started to draw a flower bed schematic diagram (haha, typical engineer). I also decided to up-cycle the wine bottles as divider. (I read that the energy that could be saved from recycling one glass bottle could provide 20% less air pollution and 50% less water pollution. One glass wine bottle takes 4,000 years or more to decompose.)


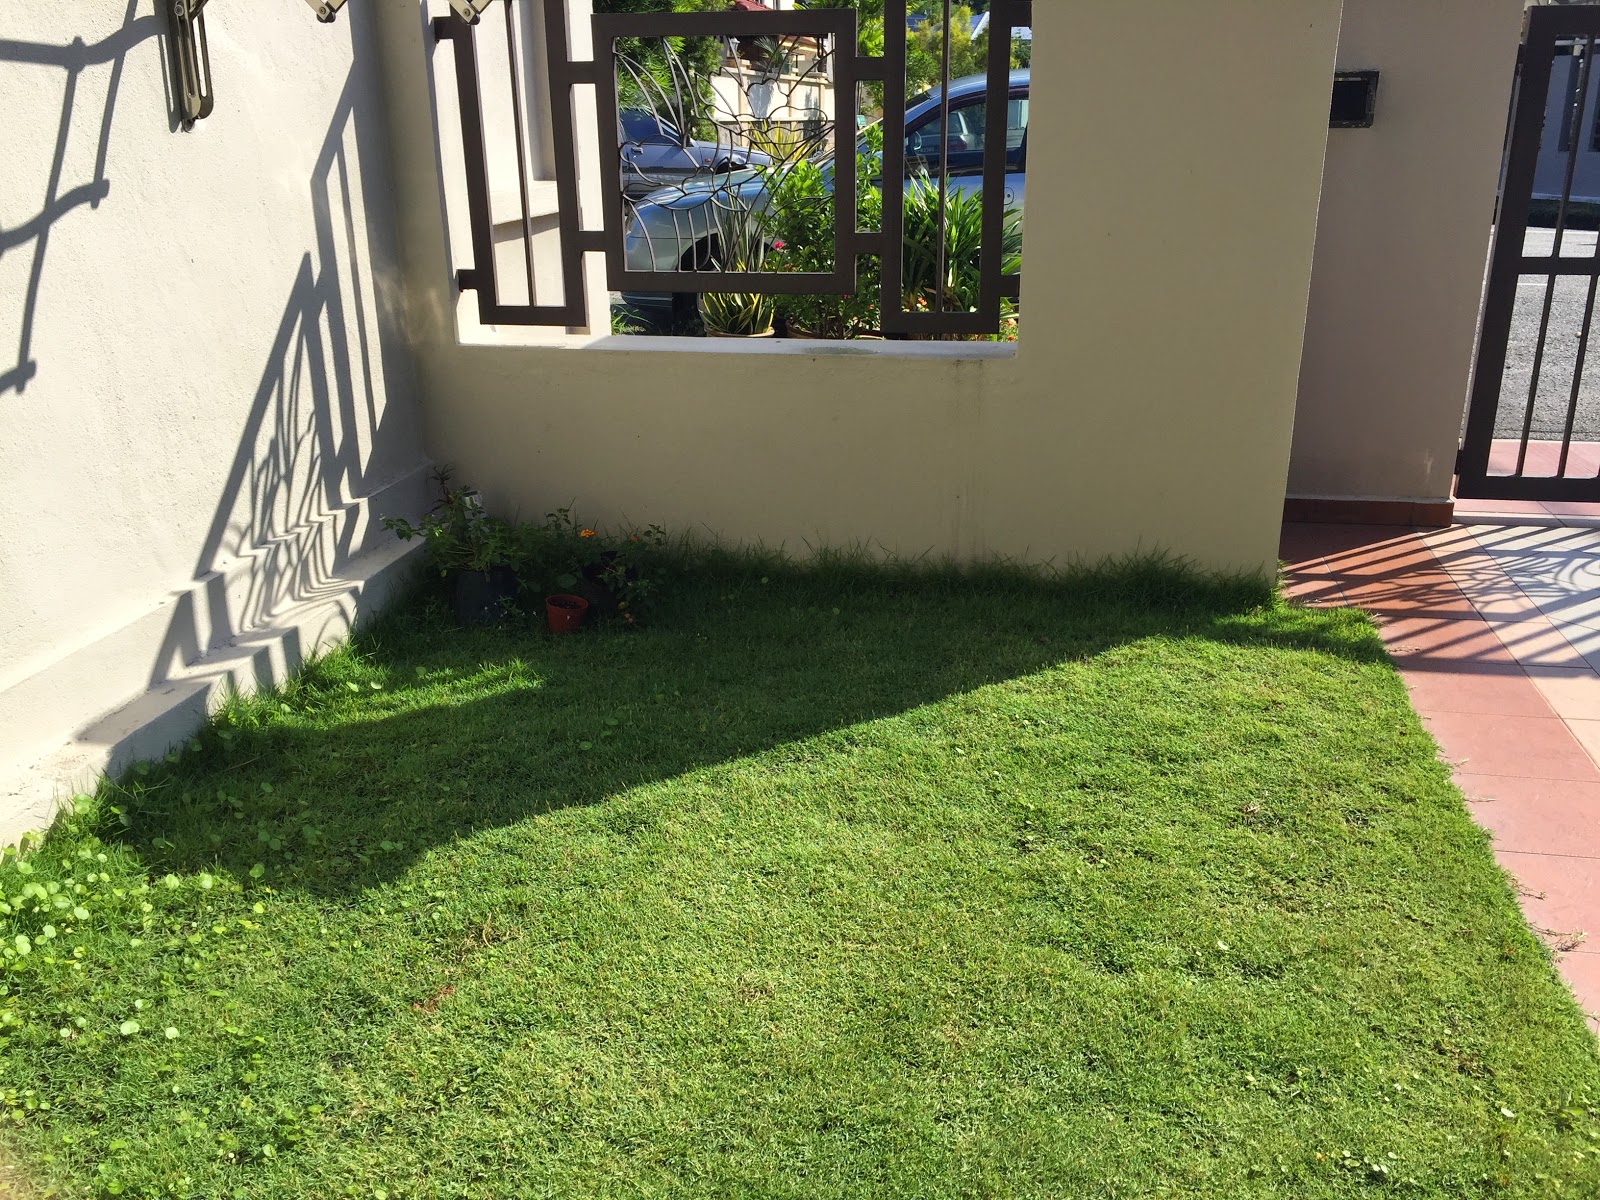
So, after moving into this house for a decade, finally, I am converting this little corner into a flower bed!


The Weekend Project: 
Last Sunday, the project officially started!

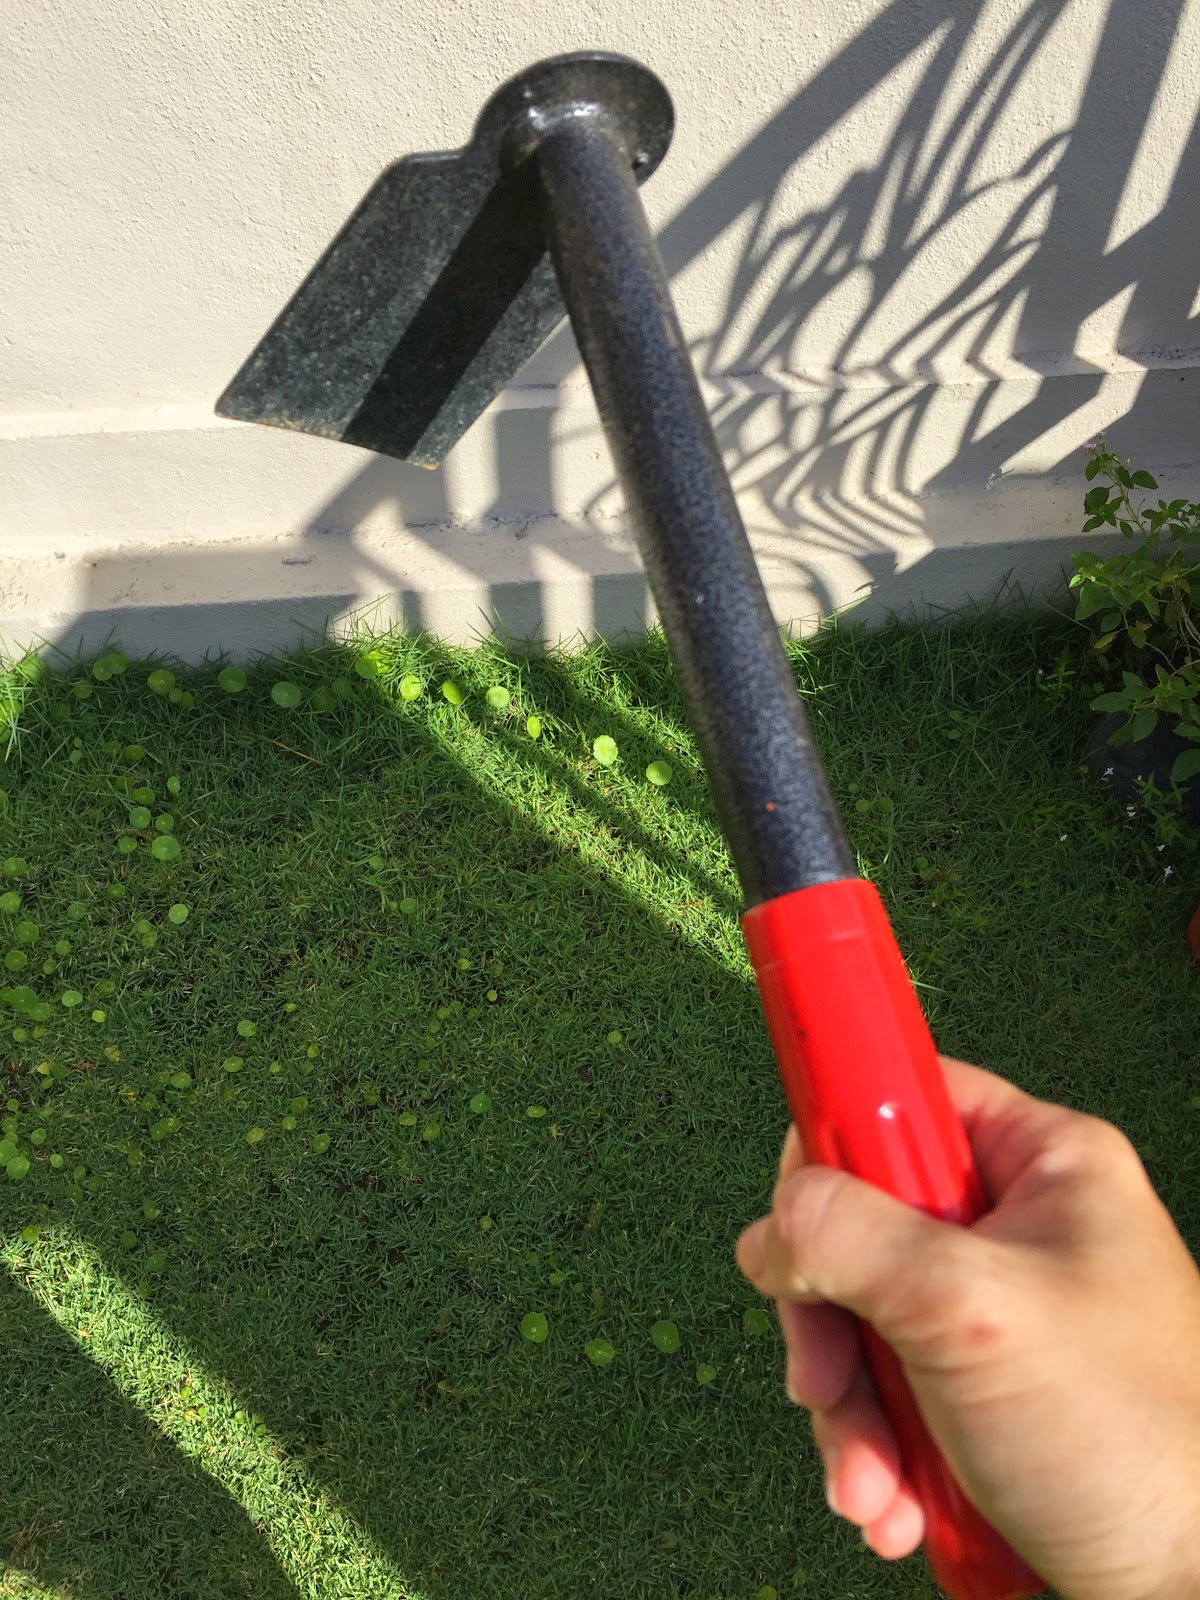
I knew I need a proper hoe for this purpose, but I couldn't wait!! The weather was nice, and I was in the mood. I was not going to waste my time asking around to borrow a hoe, so I decided to use this tiny little hoe instead. For a person that seldom performing labor work, this almost killed me. Those muscles that I haven't used for years started to shout and cry. I ignored them and working hard under the hot morning sun. After almost 2 hours, the area was ready. I was exhausted, and decided to rest for a while before I begin the second phase. 


After my afternoon nap and lunch, I started phase 2. I dug holes and planted the wine bottles upside down. In less than an hour, before I could complete second phase, it started to rain, and rain, and rain! Non-stop! I gave up, and decided that I could continue during Labor Day.


The day before Labor Day, I saw this when I reached home after work:

My dad cannot stand the sight of wine bottles scattered in the garden so he decided to help me to complete Phase 2.


So, the first thing I did after my Labor Day breakfast was to add gardening soil for the raised flower bed.  


What I planted: 
I replanted my 3-weeks-old Asteraceae (sorry, still haven't figured out the species name) from their original pot to the flower bed.


I use Snake Plant as divider, hiding the bricks.


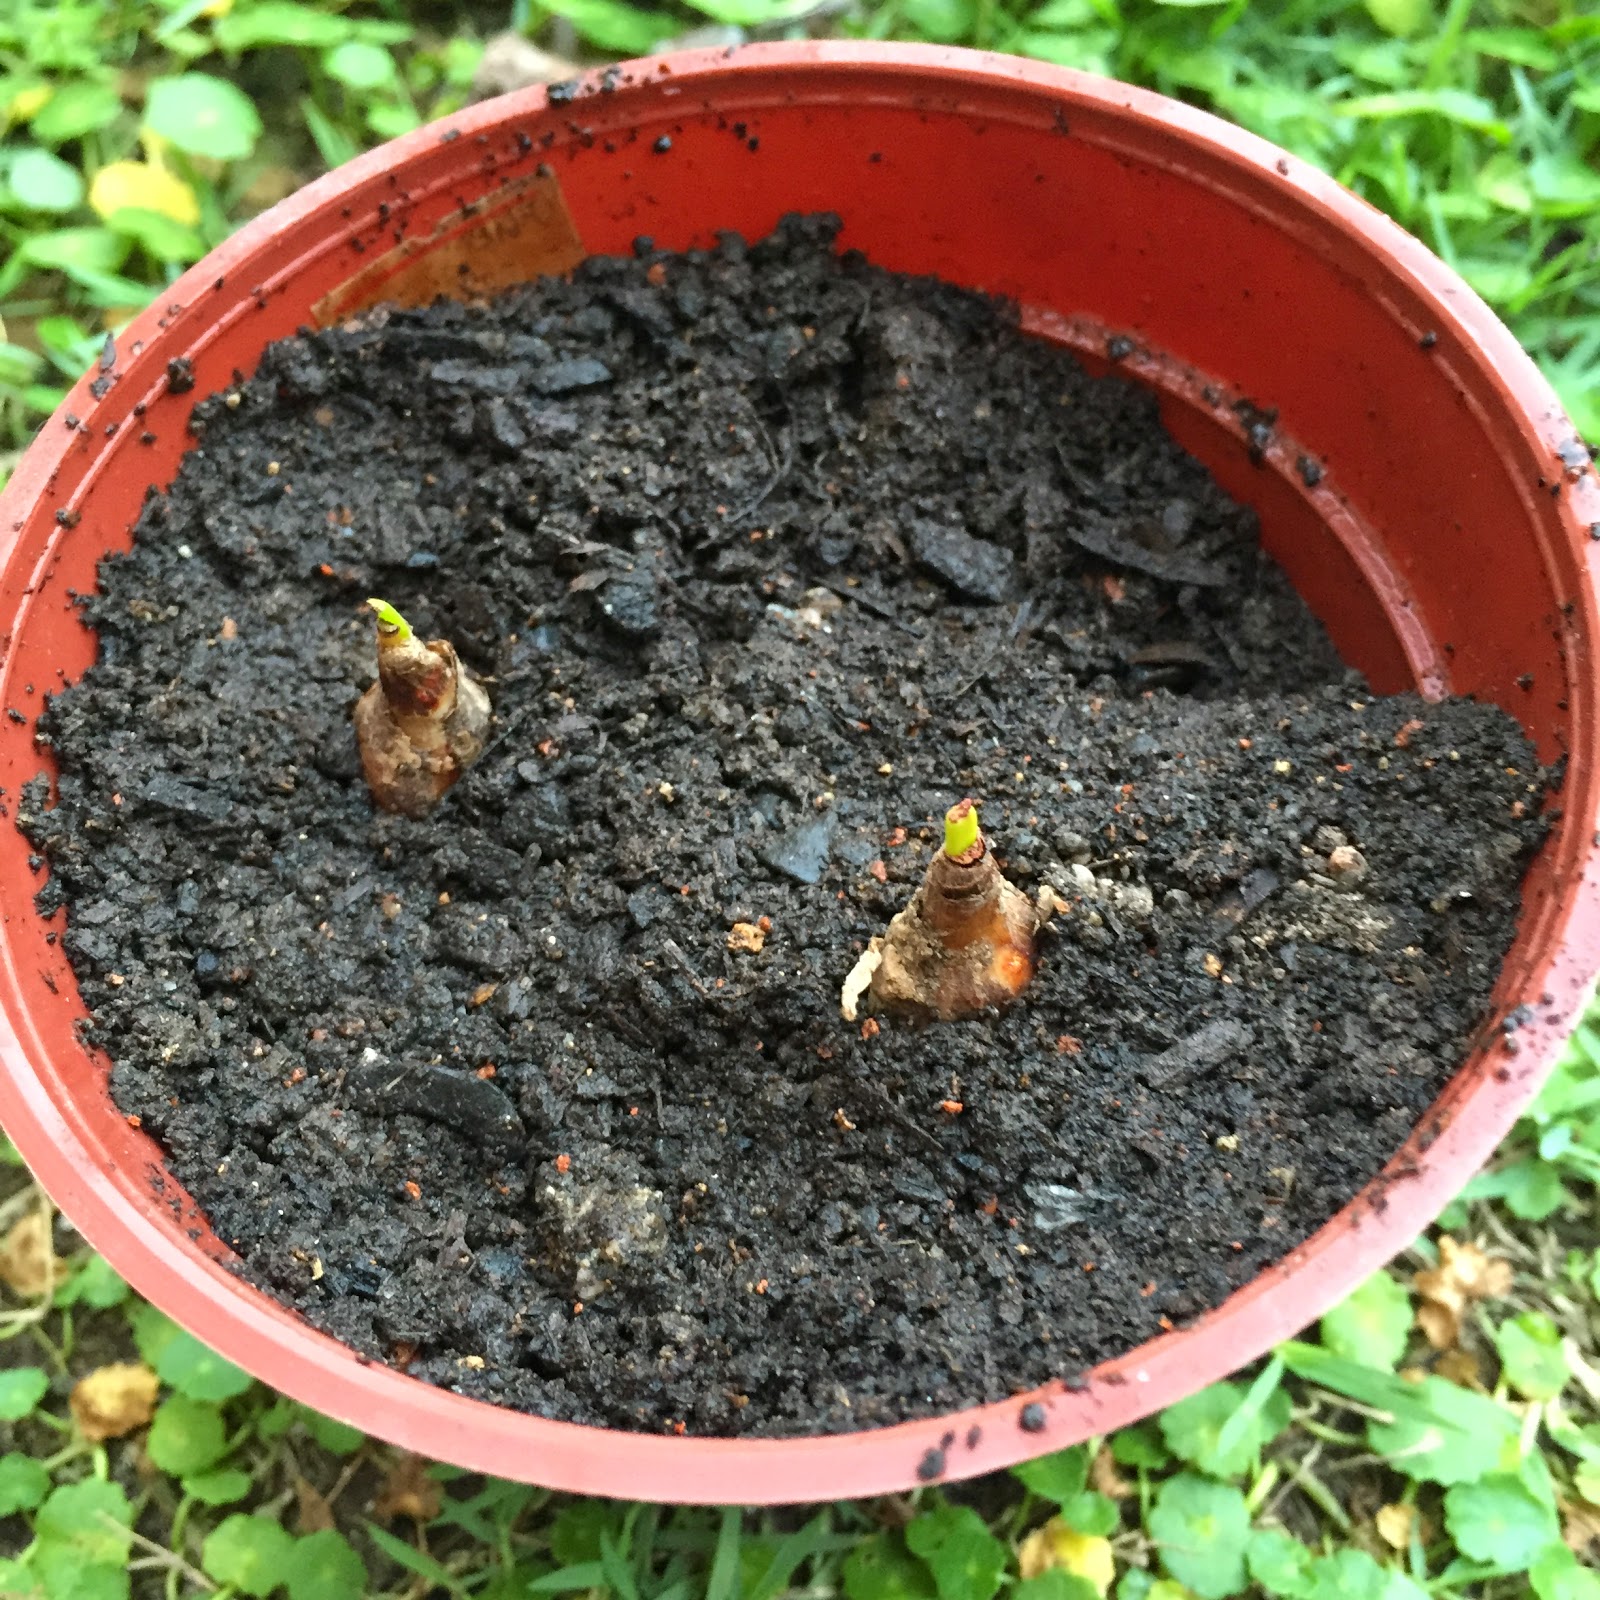
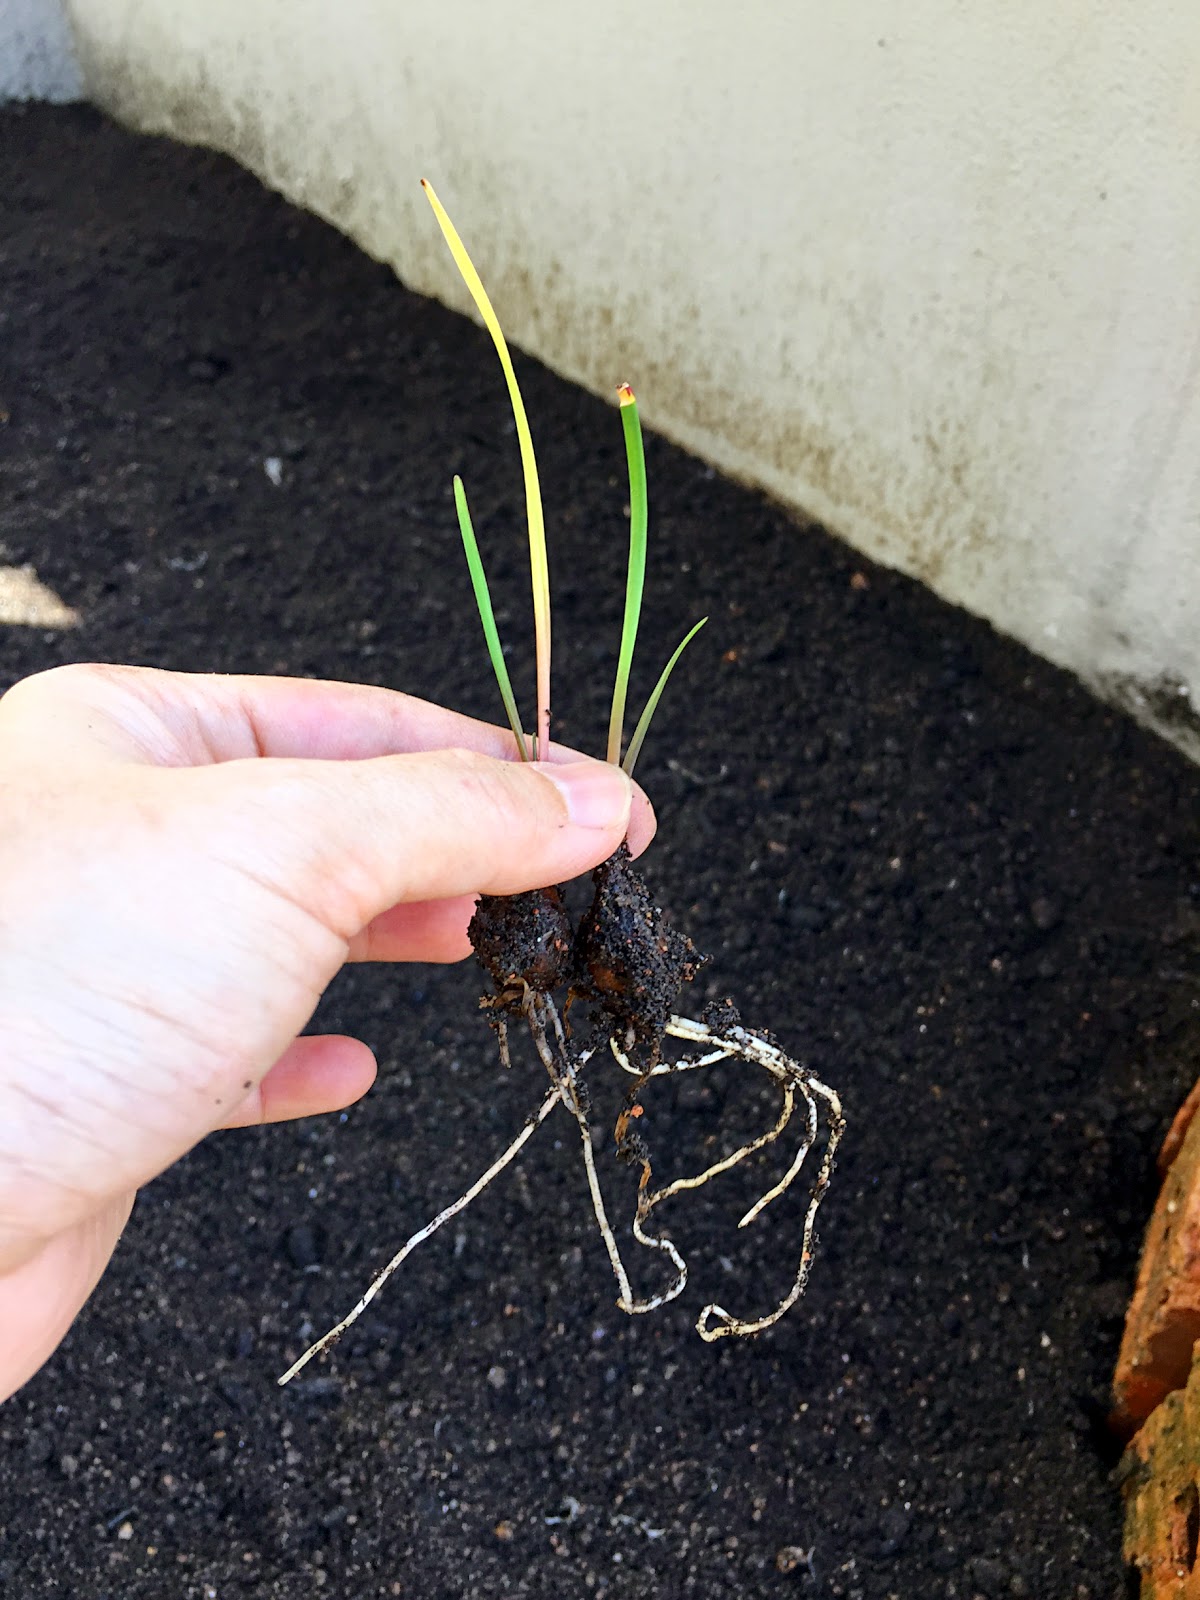
I also planted 2 rain lilies (葱兰及韭兰) that I bought from taobao mid of March. They don't seems to grow well, but I saw healthy roots so i guess they are doing well, just waiting for their season to bloom.
Rain lilies - Day 0 when I received

Rain lilies 1.5 months later
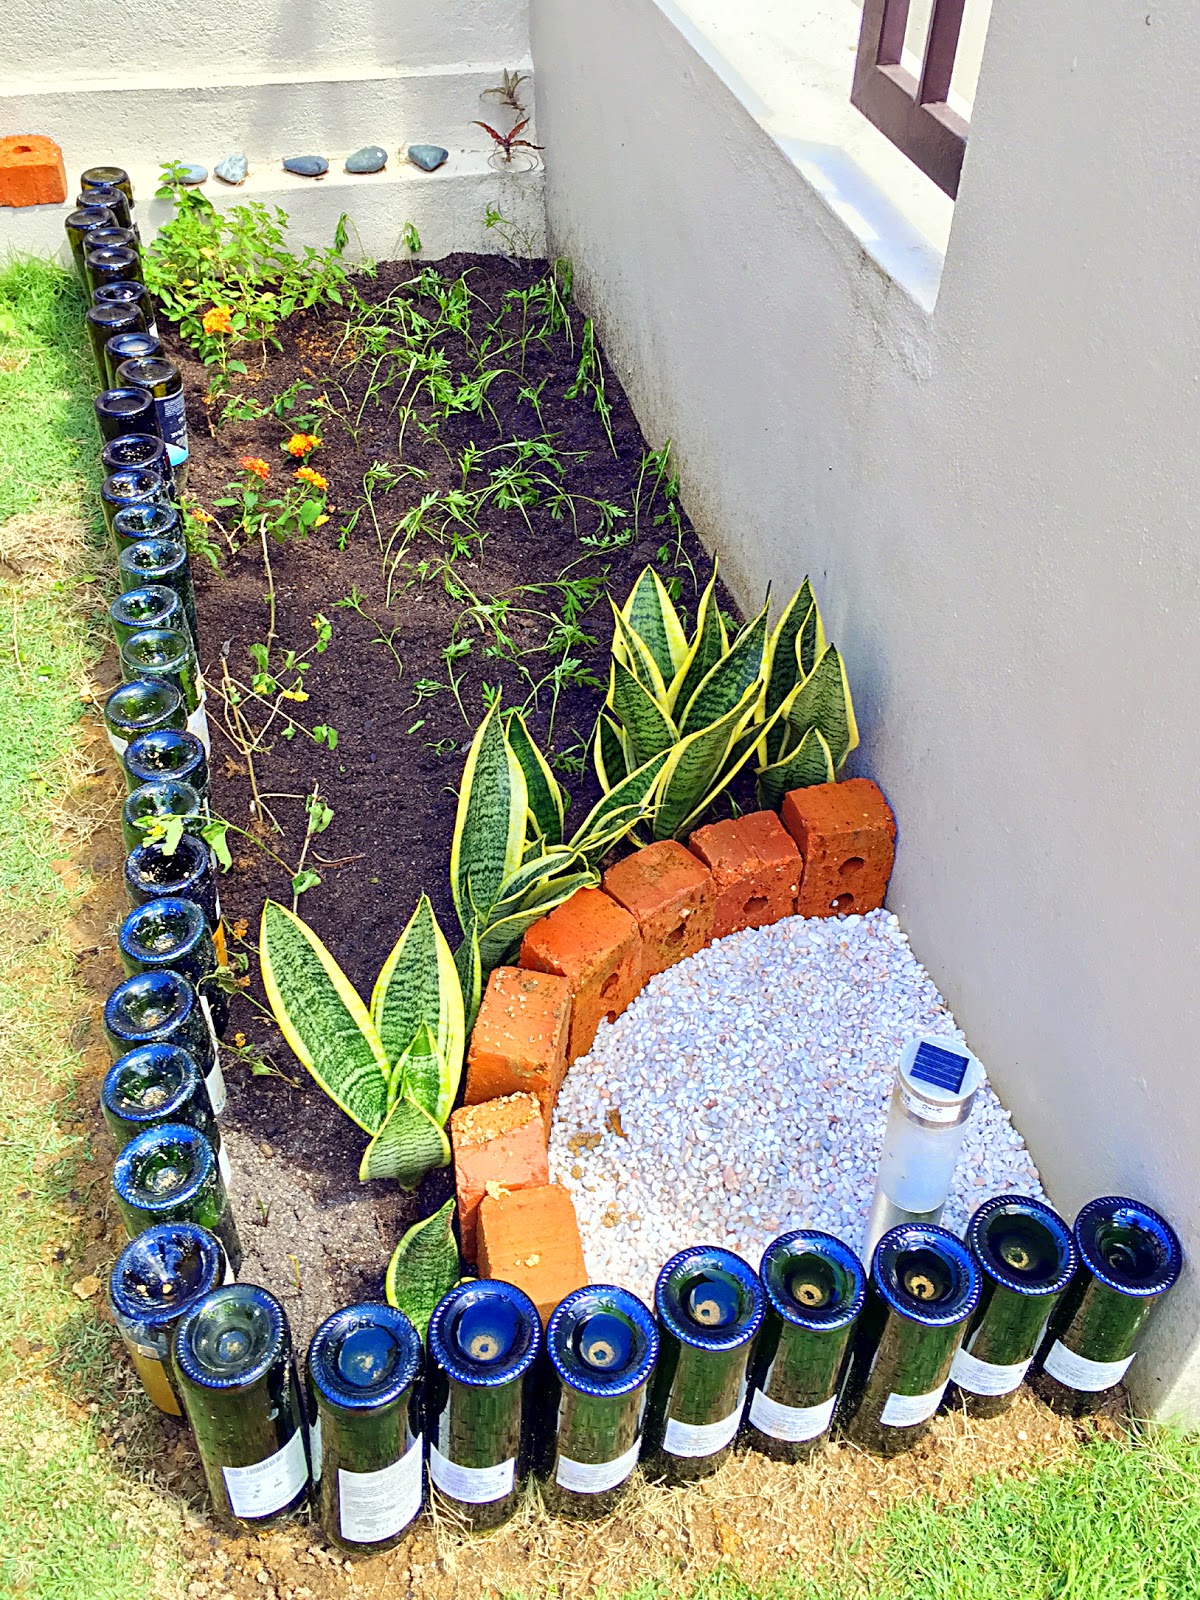

I planted lantana in the first row, and Asteraceae at the back. Hopefully adding enough texture and colours to this flower bed.

The corner divided by bricks is the special corner for my succulent plants. Since I have another batch of purchase this weekend, I'll complete this 25% next week.

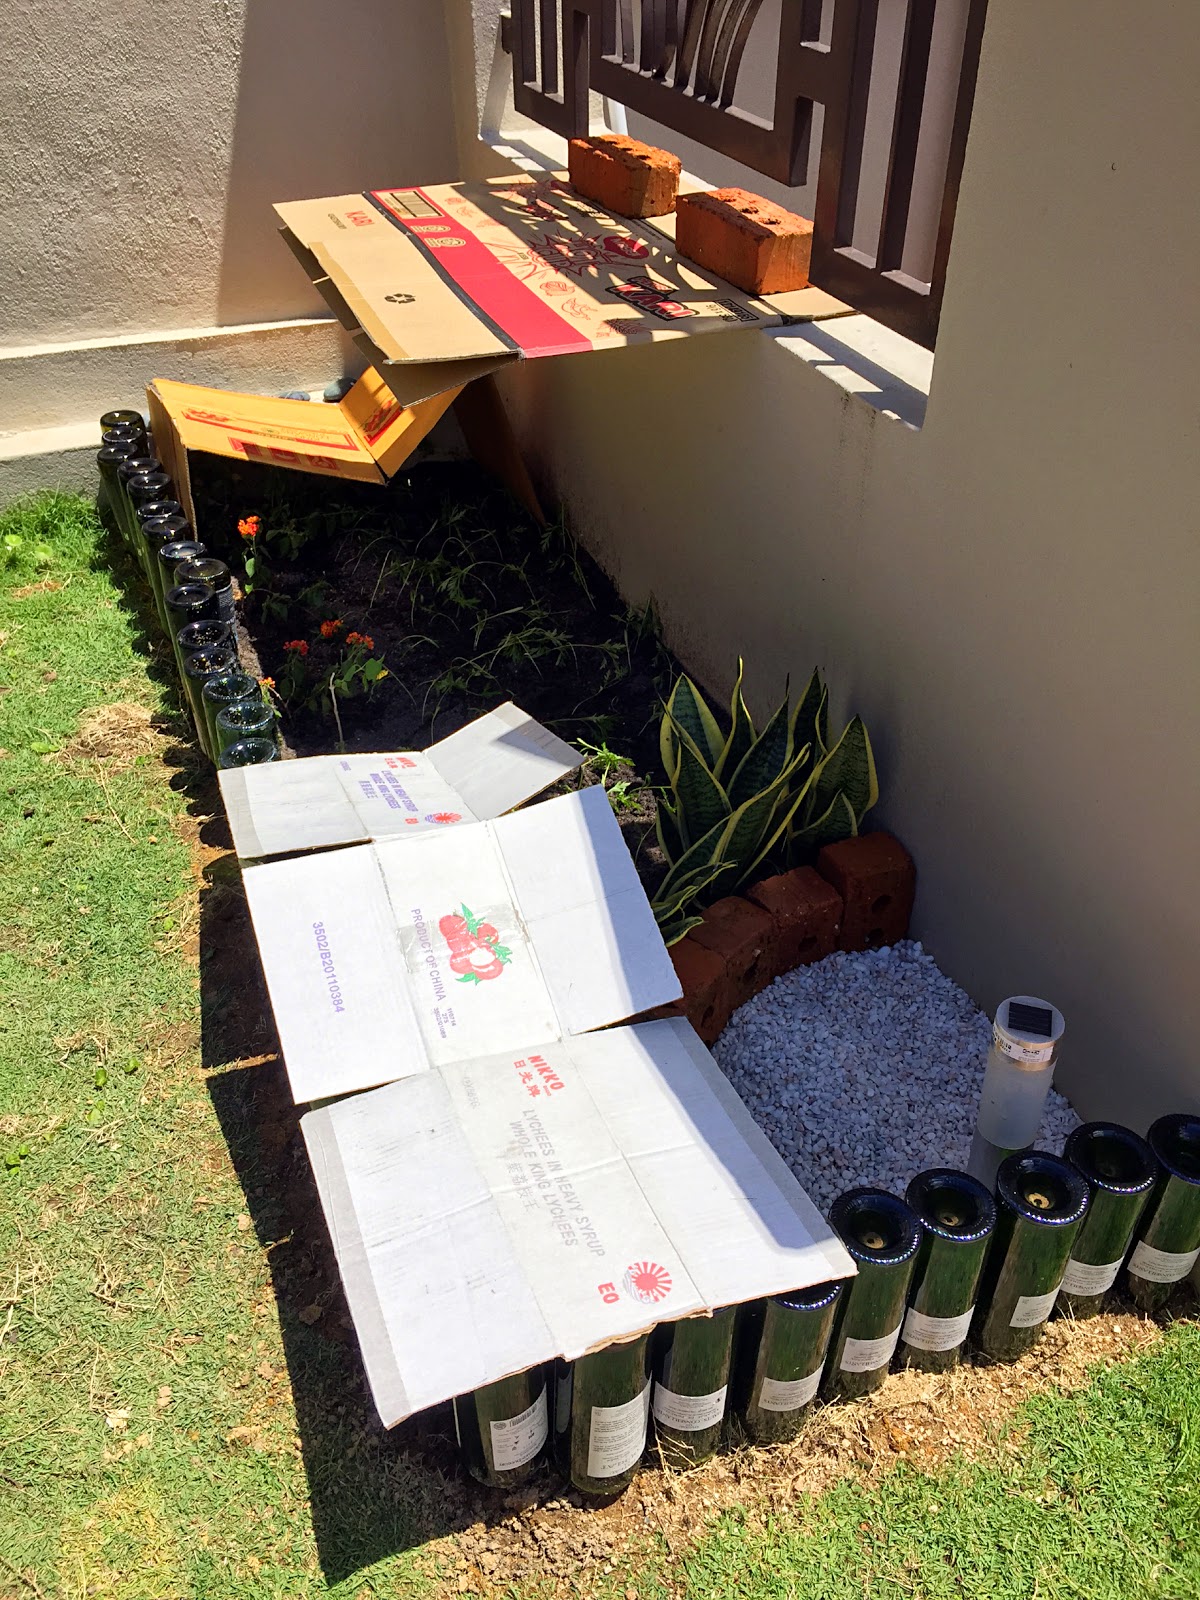
Helping them to survive tropical sun and rain while they are still weak