Sunday 19 April 2015

多肉拯救大行动

整个早上,其实就是忙着依照需水量和日照需求,为我的多肉们重组。

看我买回来时的小人祭多漂亮!


在重组的过程中,惊见我的小人祭(Aeonium sedifolius)的茎上涨了小白点,也不知道是不是介壳虫。反正安全起见,我决定快刀斩乱麻。


第一,把整盆的泥土给扔了。

第二,把根部洗清洁,好让小白点无所遁形。

第三,把冲不掉的小白点枝干给剪掉。


剪剩的,如果有根,我就把它们分成几个小盆,以便容易观察。并且把它们和其它多肉的隔离起来。

那些被我狠心连根都给剪去的,只能晒晒太阳,让剪伤处痊愈后插土观察。

给自己弄个玻璃瓶,可以观察浇水量

买了个中国风的,感觉好像盆栽,爱死了!

这个弄一盆,给朋友下毒。哈哈!

这会给朋友新居送去

这给多肉专家自己解决

珍珠吊兰 String of Pearls

I used to use "String of Pearls" to decorate my succulents arrangements as I love to add texture to my arrangements. These puffy pearls add cute-nest and softness to the arrangement at the same time


However, after I saw this following picture online, I decided to replant all my string of pearls. I need a waterfall of pearls! I decided that I can always cut them out for adding layer and texture to my arrangements later, if I really have a waterfall of pearls!

Then, I read this blog of 二木花花男, and I decided that I have to do it, immediately!

I added a layer of pebbles in the pot, then a layer of soil.


Then I remove my one and only string from current arrangement, and transfer to this new pot. Add some more soil to cover the pearls.


Pretending to be as careful as an archaeologist, I removed the excessive soil.


Water the plant thoroughly (a tips I get from internet: after re-potting, the first watering must be thorough so that the roots can grab the soil faster)


Put the pot in a tin pot I got from Ikea years ago.


Here's my in house plant for the next few months! It has to sleep with me until it gives me a waterfall of pearls :)

Saturday 18 April 2015

Upcycled Sake Box as Succulent Planter

I got a sake box a few weeks ago, and I always wanted to turn it into an upcycled succulent planter. Initially I wanted to turn it into a container for living wall, however, after a few considerations, I decided to use it for my first "logical grouping succulent plants arrangement". Why is it a "logical grouping succulent plants arrangement"? Well, because I want to replant all my succulent plants based on their water and sunlight requirements so that it is easier for me, and hopefully my plants get higher survival rate.
I do not have an electrical drill so I'm doing this the traditional way: a hammer and a screwdriver.


First, make a small dent by using screwdriver, with the help of hammer. Once the surface already have a dent, it is easier to screw and make the hole larger and larger. (Do note that even though it should be easier to make the holes at the back of the box, but from physics point of view, even as weak as me, I could easily crashed the box using hammer. Hence, I recommend to put the box upright on a firm surface for this purpose.)

Once the hole is formed, you can now turn the box and continue to make the hole larger from the other side.


I made only 5 holes. If you wish to have bigger holes, pick a bigger diameter screwdrivers.


There are very complicated advises online on how to choose the soil and how to make your own mixture etc. However, I decided to go for the easiest: pebbles and soil.

Even though I love my succulent plants, I do not allow them to turn me into a control freak and a protective freak. I decided to follow the law of evolution, let the fittest survive. Those that survive will continue to become my pet plants. Those that can't, I'll be sorry for them (and my wallet too), but I won't do anything more complicated than what I'm currently doing. Life is too short to worry about the mixture ratio of my succulent plants soil.

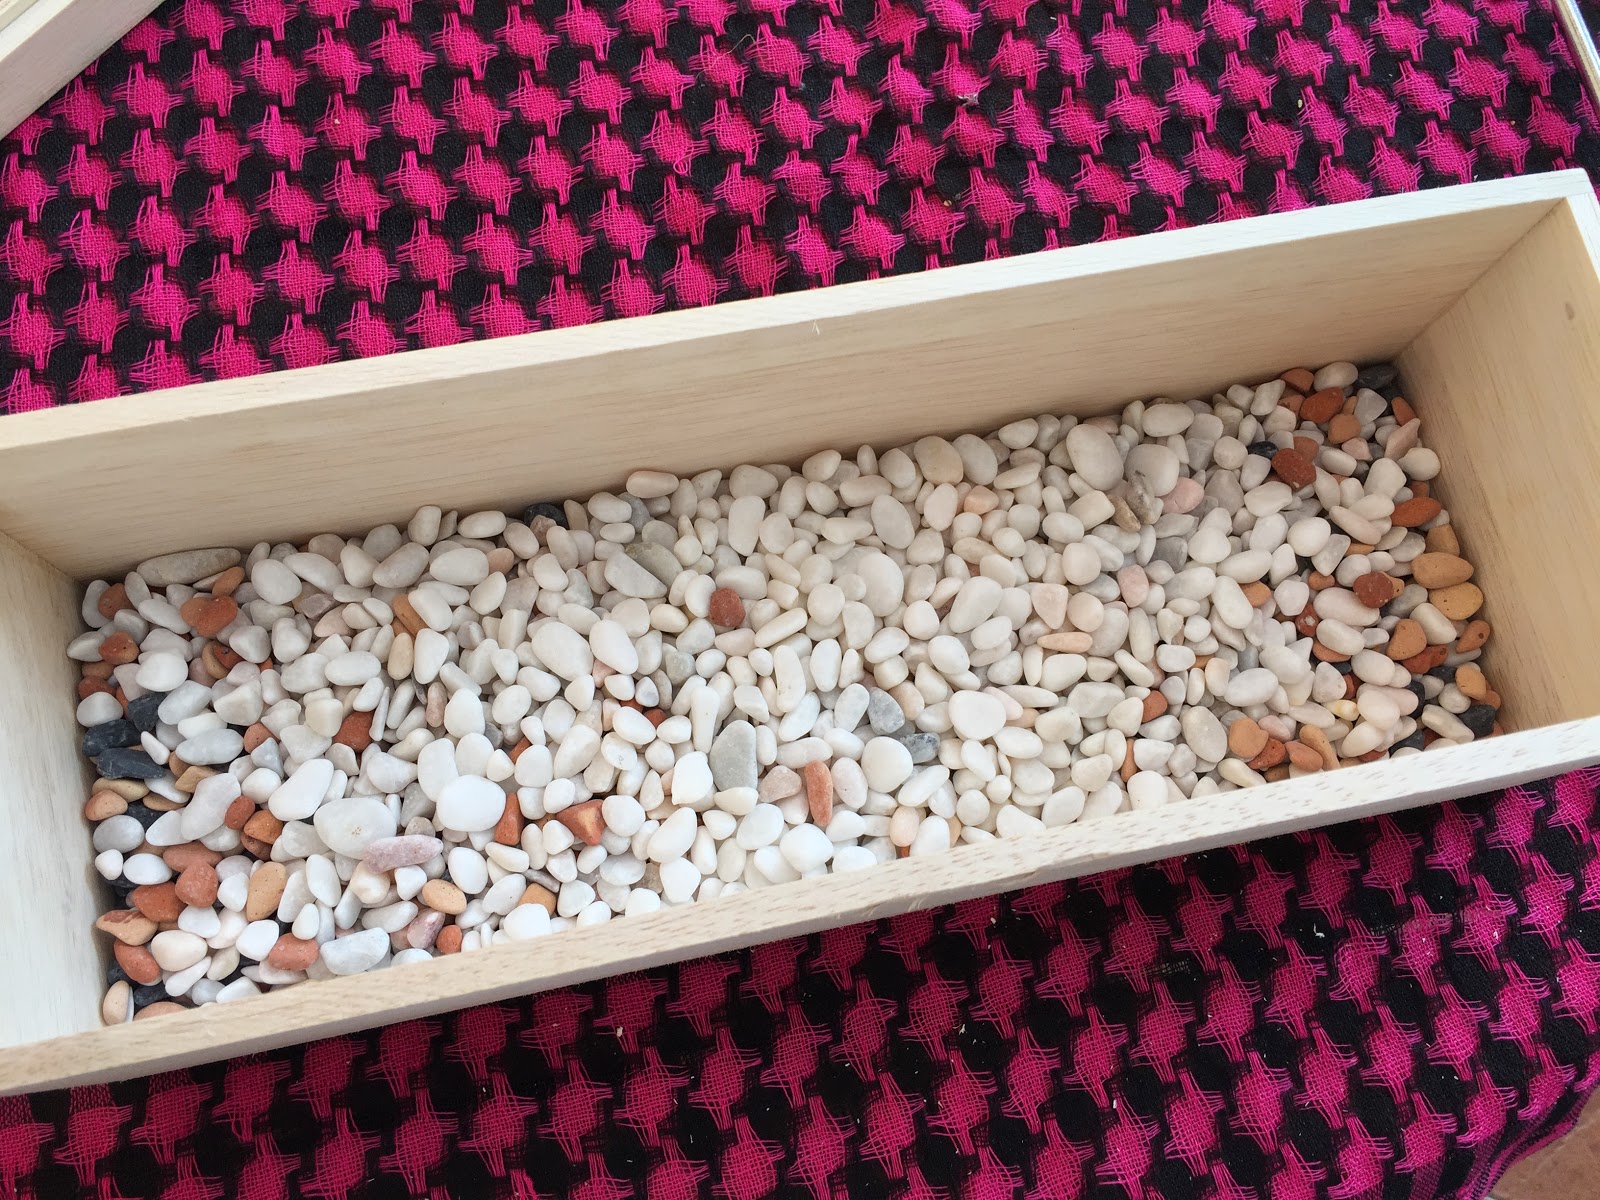
So, first, for the bottom layer, pour in an inch or more of pebbles.


Add soil (I just use whatever I have in my garden) on top of the pebbles layer.


I do spray some roots-growing-fertilizer at the bottom layer of soil, hopefully can encourage the newly transferred plants to suit to the new environment better.


Add more soil and transfer the same group of plants together. These following 5 plants that I picked are said to need 4 hours of sunlight per day, and need water twice per month (this, I'm not following. Will update the water amount needed in the future after I do my DOE)


Then, for aesthetic purpose, I added white pebbles to let my cute little succulents stand out. I use a spoon for this purpose so that it is easier for me to control.


Finally, I use a brush to remove the dirt.


Tada!! The new happy family:


Sedum rubrotinctum (虹之玉)

Highly suspected to be the baby of 鹿角海棠

Crassula perforata (星乙女)

Kalanchoe tomentosa (月兔耳)

Echeveria 'Perle von Nürnberg (紫珍珠)

Hopefully they can all grow healthily and live at my house happily ever after :)

Succulent Plants Care in Tropical Countries

I started to fall in love with succulent plants a few months ago. I have sacrificed a few plants as a new owner, and hence started to learn online on how to take care of these sensitive babies. Unfortunately, most of the blog owners are from temperate zone. Most of the advises are not applicable for us in the tropical countries. So, I decided to start a new label "Succulent Plants" and "多肉植物" in my blog to share what I've learnt, to share my experiments, to share how I decorate them etc.


I mainly follow the field guide written by 二木花花男 to identify my plants, and to group them into different categories base on their requirements of sunlight and water. Image below shows the example. The sunlight indicator of 4 suns show that they need 4 hours of sunlight per day; the water indicator of 3 droplets show that they need to be watered 3 times per month.


Do note that due to the field guide can only be our reference but not to follow strictly. We at tropical countries are too warm, too humid! And we do not have the huge temperature fluctuate within a day. So I only use them for grouping purpose but I still have to do my DOE to learn how to control the watering.

Example of how I group them together: Upcycled Sake Box as Succulent Planter

Sunday 12 April 2015

出淤泥的宝贝

这,要和大家分享我的植物淘宝初体验。

话说我们迷上多肉植物,决定到淘宝找一些这儿没有的品种。适逢农历新年,我们一群淘宝客难忍没得购物的煎熬,依旧上网找着看着,一开市,我不知不觉就买了两颗迷你睡莲的根块。

我们新年后的第一批网购,于三月十七日到达我家。

包装有点儿随便

块根和我想象中的有一点出入。同事说,她要看到这个样子,应该当垃圾给丢掉了。
两个块根

我找了个器皿,加土,把两个块根埋入,浇上水即可。


一个星期过后,发芽咯~ 我便把发芽后的睡莲连器皿一起放入我的小水池。


十天后,叶子都长出水面了


这是9.4.2015时我的迷你睡莲的模样:


感觉上我现有的小盆太拥挤了,于是今天决定来个搬迁大行动。首先,把原本的土呀、植物等都掏空,然后把两棵迷你睡莲分种于两个小盆,这才开始landscaping的工作。


由于这是临时决定(原本要锄地设计花床,但看风雨欲来的样子,还是找个‘半室内’project即可,这才决定小池塘大搬迁),材料有限,决定在原有的物品中变化,改天再增添。

换了个大盆,最开心的就是鱼儿们。从project完毕到现在它们还在兴奋地游上游下的,更爱在流水处戏水。这小小project可真的做对啦~

禅味十足的趣味小乌龟一定要继续用

木头假山、空凤和近乎不必照顾的翡翠木照样上场

我的迷你睡莲们和浮萍们终于有松动的空间啦~